
Stripe Checkout Integration with Angular
In this article, we are going to learn how to integrate “Checkout with Stripe ” in latest version of Angular (currently 10.1.4)
In this article, we are going to learn how to integrate “Checkout with Stripe” in latest version of Angular (currently 10.1.4)
What is Stripe?
Stripe is softwareand APIs to accept payments, send payouts, and managetheir business online
Goal
We are going to learn,
- how to create a product in Stripe
- integrate that product in Angular for hassle free checkout experience for our users.
Notes
Remember that, All the product related data & keys in stripe we have to create in “Test Mode”
Prerequisites
- angular-cli version 10.1.3 or later
- Nodejs version 10 or later
- Basic knowledge of Angular is required
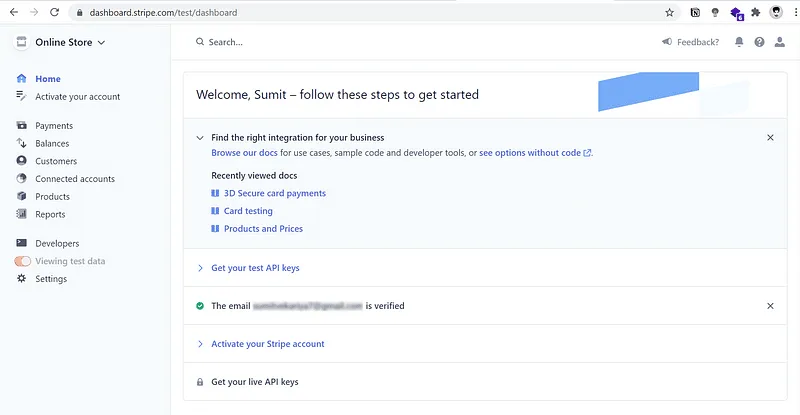
1. Create an account on Stripe and Sign in and go to dashboard for the next step:
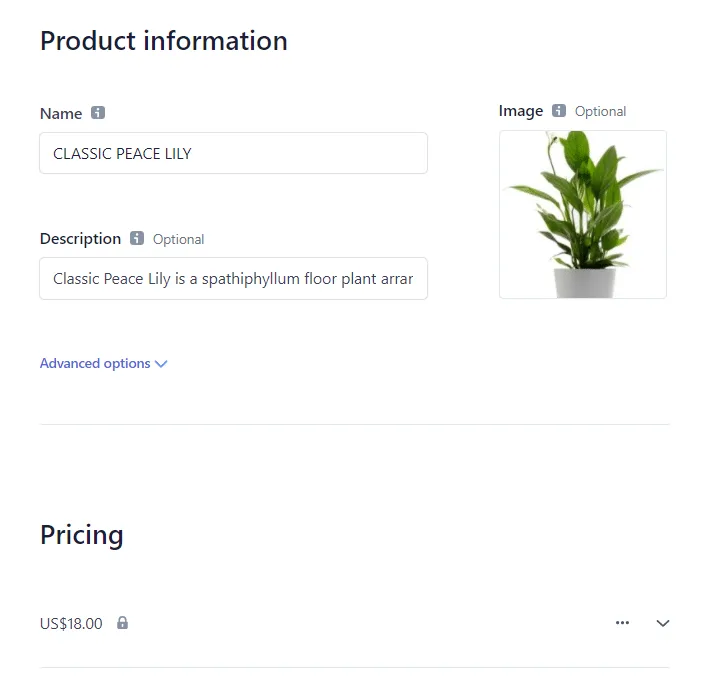
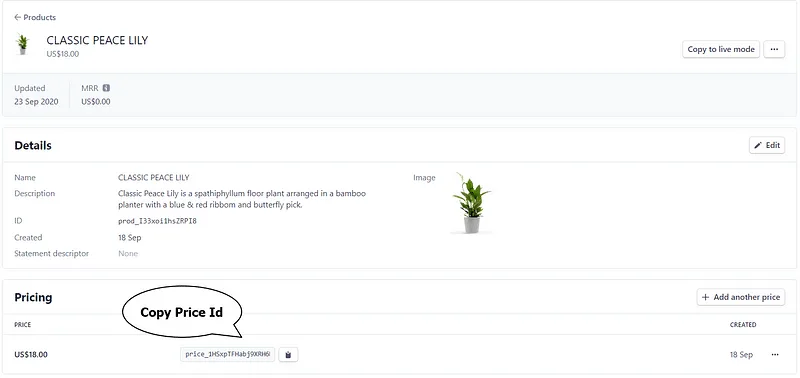
2. Create a product & save the priceId for later use in Angular
3. Create an Angular starter application using Angular CLI
ng new angular-stripe --style=scss4. Install Stripe js using NPM:
npm i @stripe/stripe-js5. Create components => Product and Successful Transaction and Failed Transaction
ng generate component product
ng generate component success
ng generate component failureProductComponent: Where we show product details
SuccessComponent: Where we show success message
FailureComponent: Where we show failure message
6. Now, we will add the routes for components that has been created
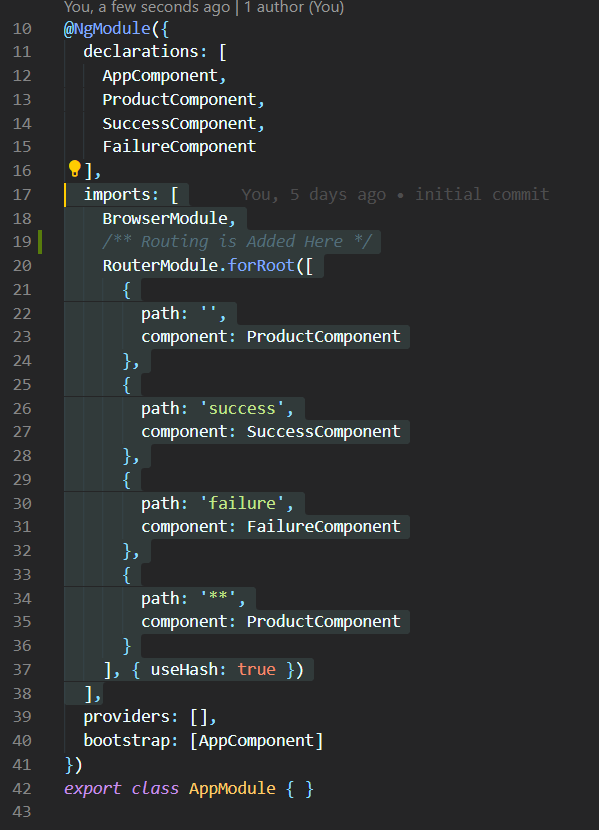

7. Generate Publishable Key for fetching the stripe interface
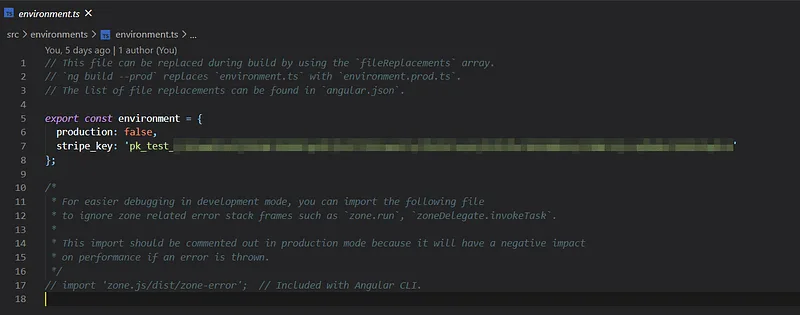
Generate the Publishable Key from Stripe Dashboard => Developers => keys
8. Set the generated API keys as environment variables for later use
9. Create Product Data Variables in ProductComponent to use them in Product UI
productobject will be used in the product template for UI
priceIdwill be used while redirecting user for the checkout
title = "angular-stripe";
priceId = "price_1HSxpTFHabj9XRH6DMA8pC7l";
product = {
  title: "Classic Peace Lily",
  subTitle: "Popular House Plant",
  description:
    "Classic Peace Lily is a spathiphyllum floor plant arranged in a bamboo planter with a blue & red ribbom and butterfly pick.",
  price: 18.0,
};
quantity = 1;
stripePromise = loadStripe(environment.stripe_key);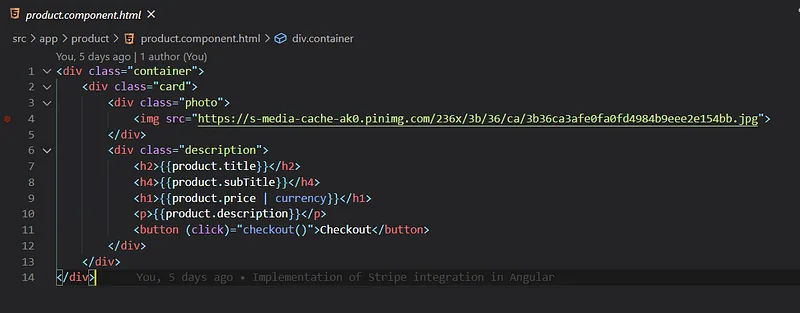
10. Create checkout method for redirecting user to Stripe checkout page
async checkout() {
  // Call your backend to create the Checkout session.
  // When the customer clicks on the button, redirect them to Checkout.
  const stripe = await this.stripePromise;
  const { error } = await stripe.redirectToCheckout({
    mode: "payment",
    lineItems: [{ price: this.priceId, quantity: this.quantity }],
    successUrl: `${window.location.href}/success`,
    cancelUrl: `${window.location.href}/failure`,
  });
  // If `redirectToCheckout` fails due to a browser or network
  // error, display the localized error message to your customer
  // using `error.message`.
  if (error) {
    console.log(error);
  }
}
Full Code is available herefor the reference.
Click here to see the demo to try.
Unimedia Technology
Here at Unimedia Technology we have a team of Angular Developers that can develop your most challenging Web Dashboards and Web apps.
Tagged
Keep reading
More on Angular

Java 25 Is Here: Discover the Key New Features
Explore how Java 25 enhances developer productivity with AI-ready features, stronger security, faster performance, and long-term support.
Technical Guides

Kubernetes 1.33: Greater Scalability, Security, and Efficiency
Kubernetes 1.33 delivers smarter scaling, streamlined operations, and improved observability for modern DevOps and platform teams.
Technical Guides

React 19.1: Should You Upgrade Now?
Discover what’s new in React 19.1—from debugging upgrades to Suspense fixes—and whether it’s the right time to update your project.
React